rocknix

Install a free SSL certificate in Plesk

Install SSL Certificate Free in Plesk

If you’re using another hosting provider or want to install an SSL certificate in Plesk yourself, you can follow this article.

*** Note *** Let’s Encrypt SSL installation is in case of a new registered domain. Or have the server moved after pointing the Name Server, wait for the DNS to update successfully (at least 4-24 hours) before it can be installed.

1. Example when visiting a website without SSL certificate installed

2. Login to Plesk by typing the website name followed by port 8443, for example yourdomain.com:8443, then fill in your Username, Password and click on Log In.

3. Click on SSL/TLS Certificates on the domain you want to install the SSL certificate.

4. Click on Install.

5. Specify the details as follows

  • Email address : Enter your email address to receive notifications.
  • Checkmark ✓ to the box Secure the domain name.
  • Checkmark ✓ to the box Include a “www” subdomain for the domain and each selected alias.
  • Checkmark ✓ to the box Secure webmail on this domain.

Then click on Get it free.

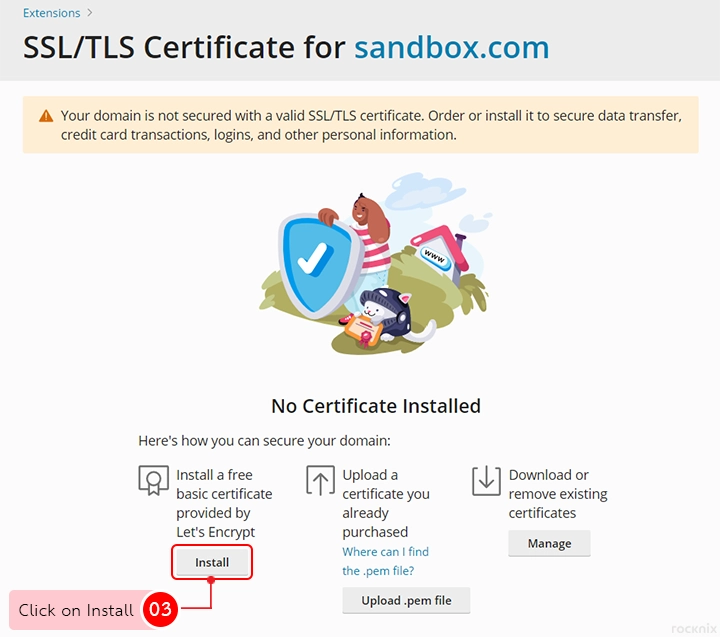
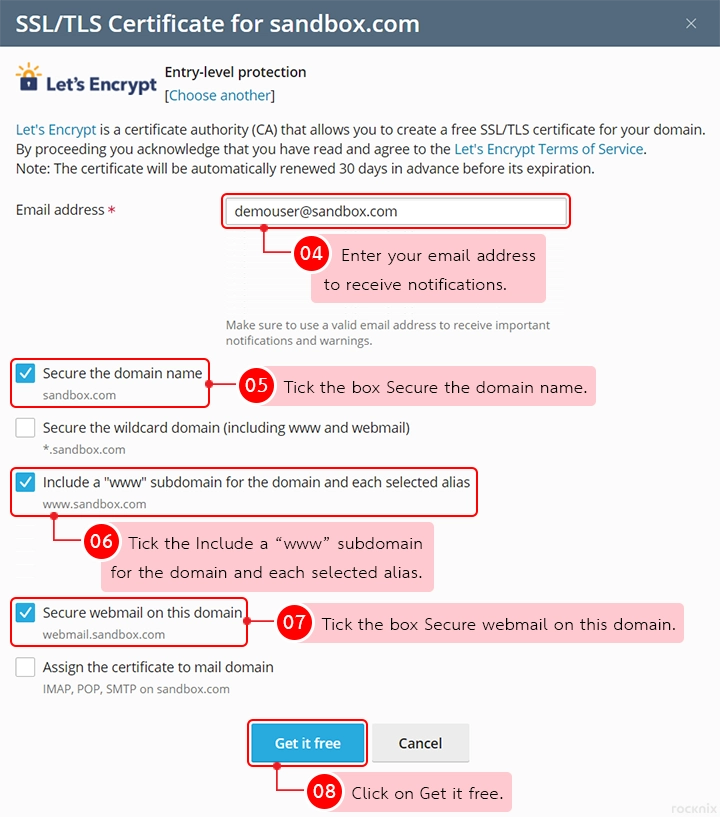
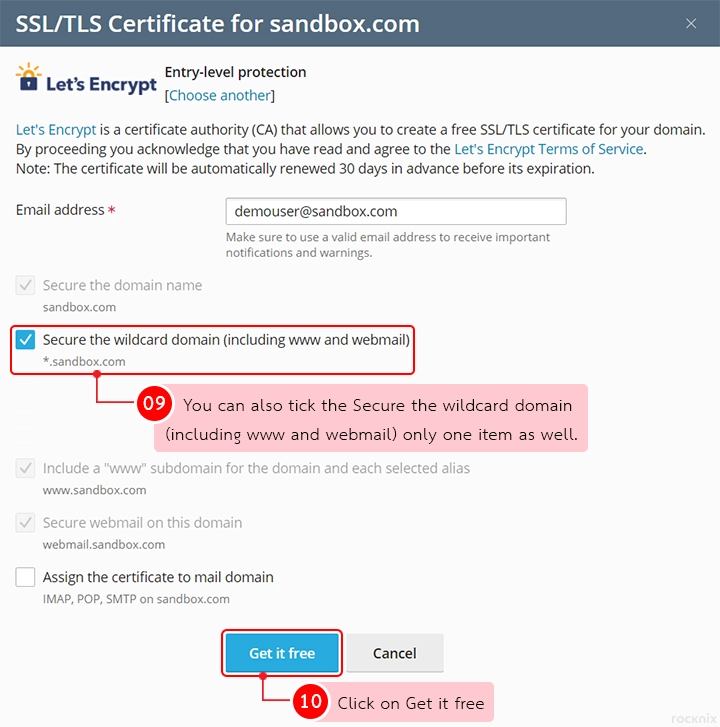
You can also tick the Secure the wildcard domain (including www and webmail) only one item as well. (No problem with e-mail in the body) It is recommended to choose a wildcard because it will include the sub domain too. If you don’t choose it will only get the domain, eg domain name abc.com and subdomain name 123.abc.com if you choose wildcard. It will include 123.abc.com as well, if unchecked only the abc.com domain.

6. Wait for the system to complete the DNS update and install the SSL certificate for the website. Or if you’re sure that the DNS has been updated, click on Reload.

7. Once the SSL Certificate has been installed, it will show the information as shown in the example picture.

8. Example when visiting a website with SSL certificate installed.