Managing your hosting should be simple, and Plesk is designed to make that easy. With Plesk, you can manage your website, email accounts, databases, files, and key hosting settings from one central dashboard. Once your hosting service is activated, your provider will usually send the login details you need by email, including the Plesk login URL, username, and password.
This guide shows you how to log in to the Plesk Control Panel using your hosting credentials.
Before logging in to Plesk, make sure you have the following information:
- Plesk login URL such as https://yourdomain.com:8443 or http://yourdomain.com:8880
- Username for your Plesk account
- Password for your Plesk account
These details are typically sent to the email address you used when signing up for your hosting service. If you cannot find them, check your hosting activation email first.
Step-by-Step: Log in to Plesk
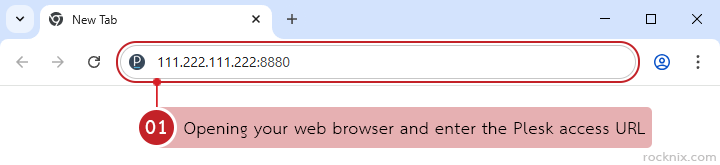
Open your web browser and enter the Plesk access URL from your email. The URL typically looks like one of the following:
- https://yourdomain.com:8443
- http://yourdomain.com:8880
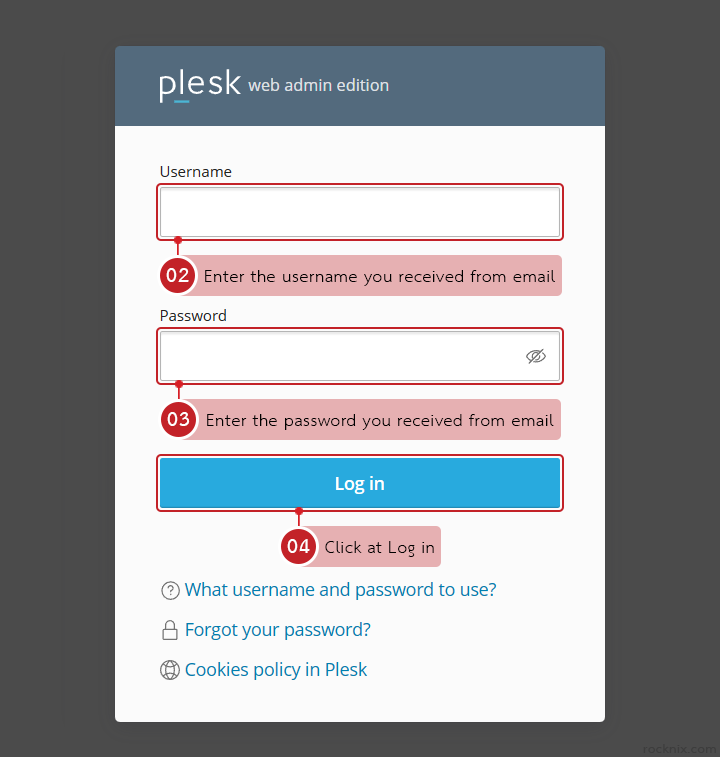
Once the Plesk login page opens, enter your login details:
- Username: The username provided in your activation email
- Password: The password provided in your activation email
Then click at Log in.
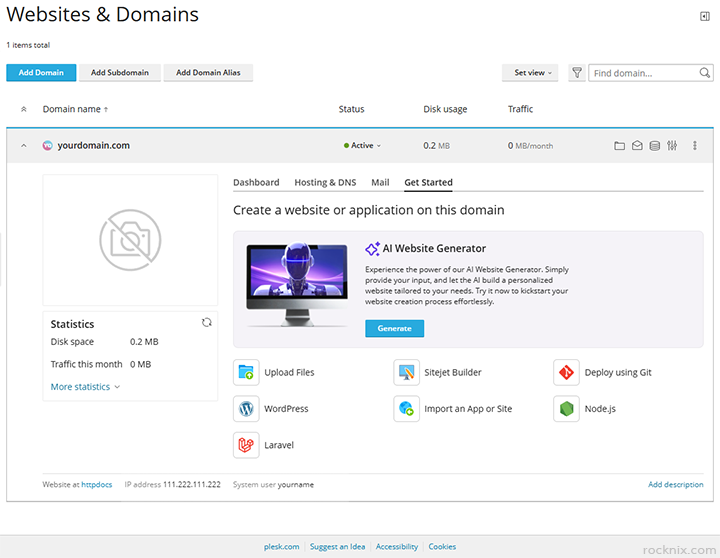
After signing in successfully, you will be taken to the Plesk dashboard. This is the main area where you can manage your hosting account and related services. From here, you can typically:
- Manage websites
- Create and manage email accounts
- Manage databases
- Upload website files
- Configure security settings
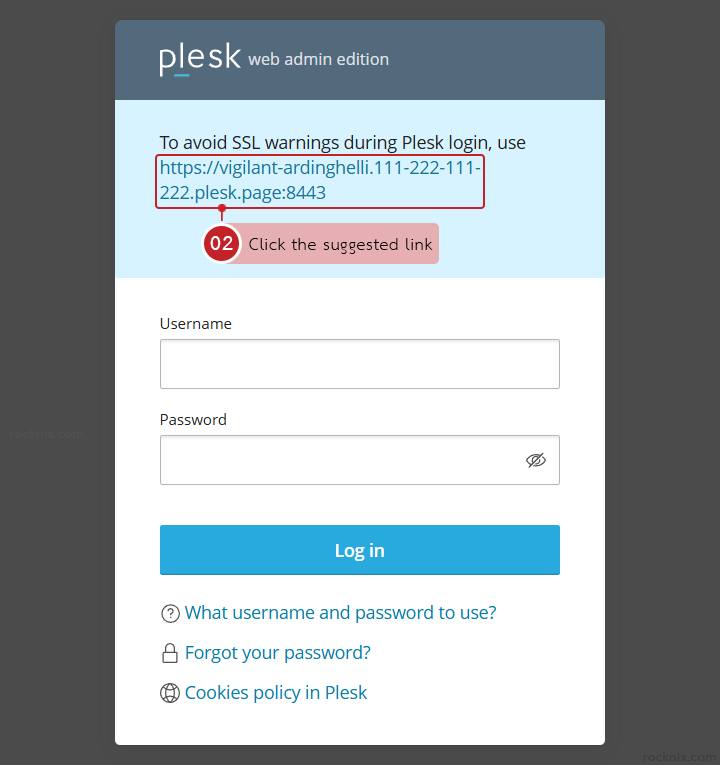
If You See an HTTPS Login Suggestion
In some cases, you may see a message at the top of the login page similar to:
“To avoid SSL warnings during Plesk login, use https://xxxx.plesk.page:8443”
This means the server provides a direct control panel URL to avoid SSL warnings during login.
If you are unable to log in to Plesk, check the following:
- Make sure you are using the correct login URL.
- Confirm that your username and password match the details in your activation email.
- Try the recommended plesk.page login link if the login screen shows an SSL-related message.
- Double-check that your hosting service has already been activated.
If this is your first time using Plesk, here are a few quick tips:
- Bookmark the login URL for quick access later.
- Change your password if you want stronger security.
- Install an SSL certificate for your domain to remove browser security warnings.
- Explore the dashboard to familiarize yourself with available tools.
If you’re looking for secure and easy-to-manage hosting, you can explore available plans to find one that fits your website.
8 Responses